Step 1: Create a Card
Create a card and choose a template.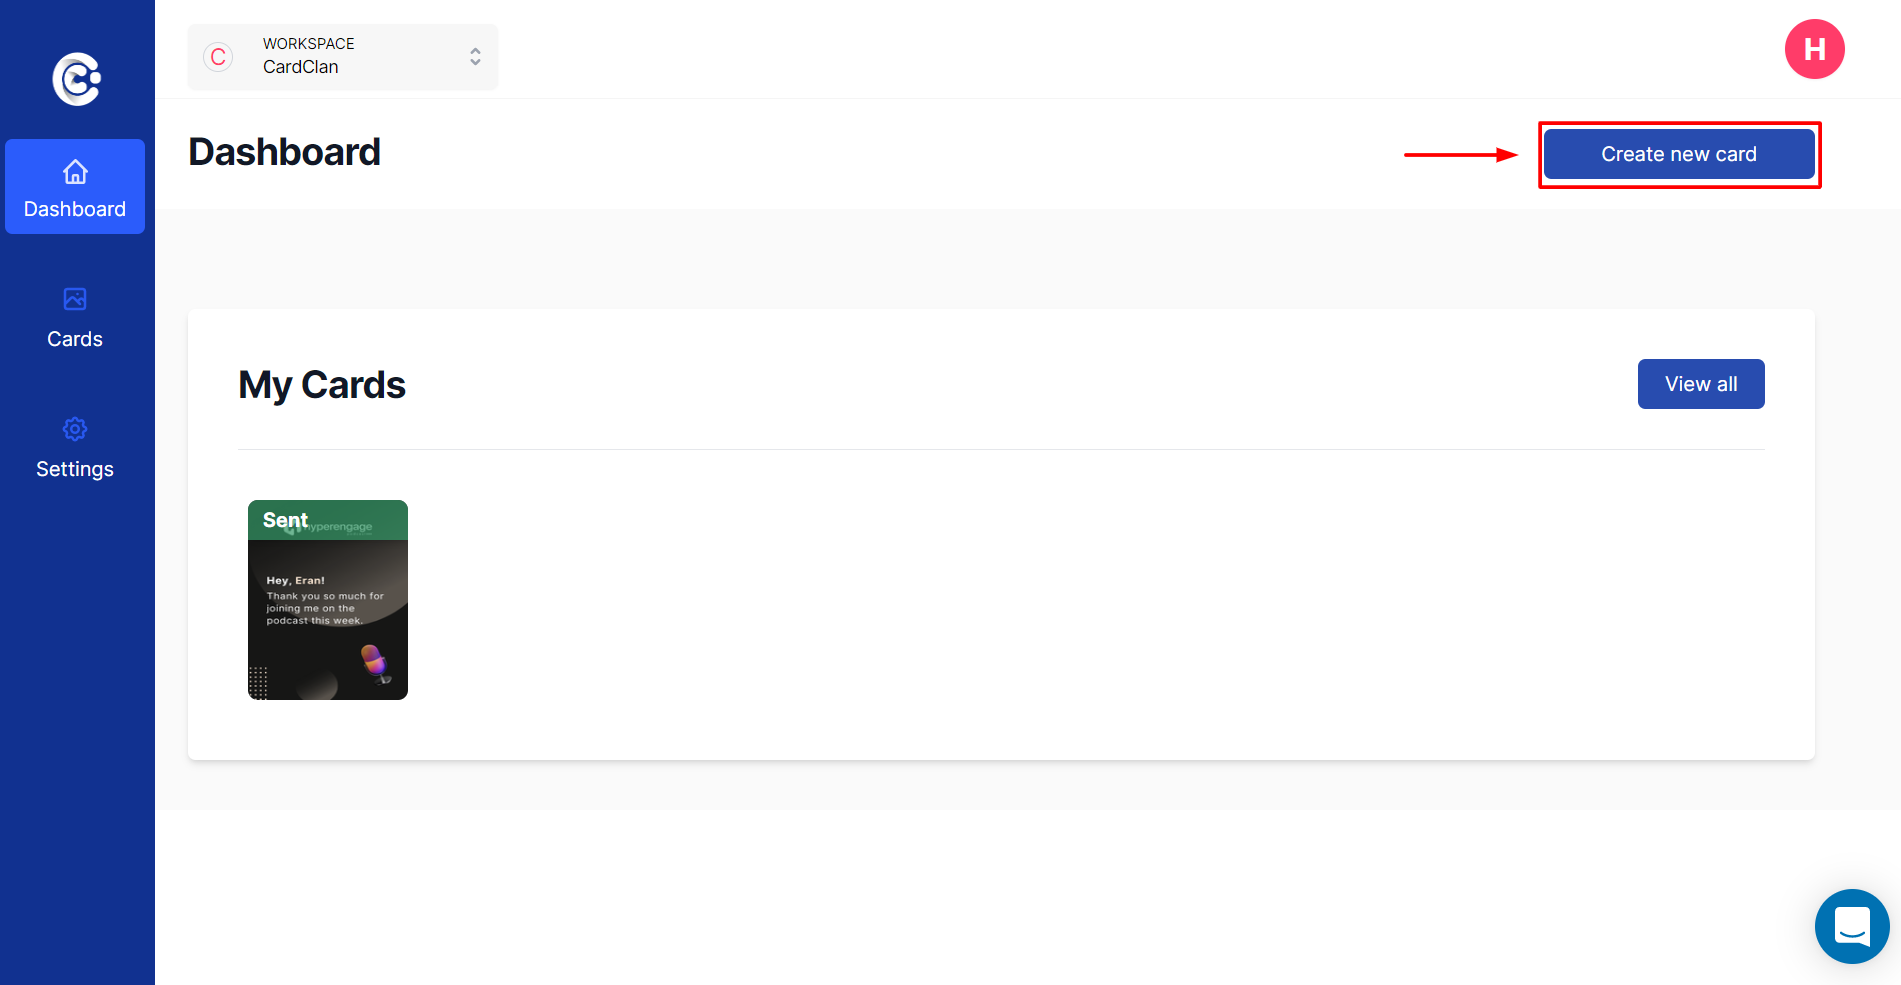
Step 2: Access the Editor
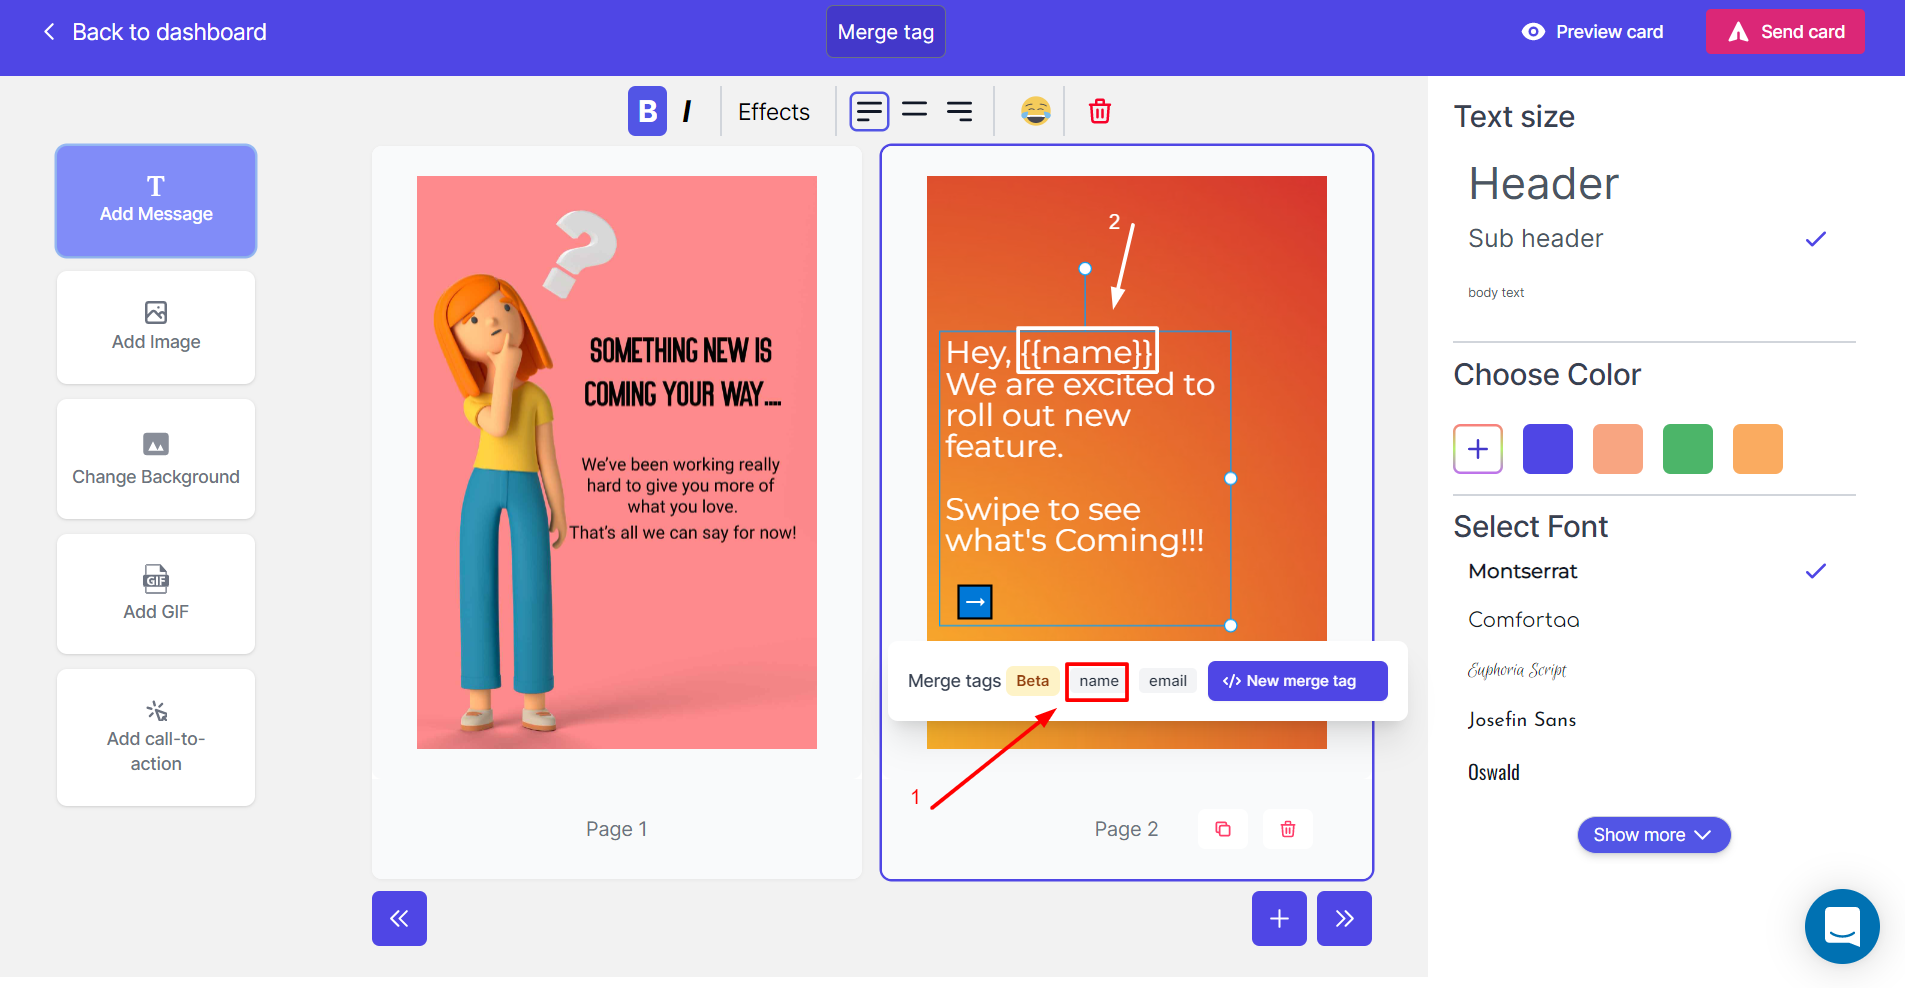
Once you are in the editor, add some text to your card.
Step 3: Add a Merge Tag
Now let’s add a merge tag. Suppose you want to call out the name of every person on the card:- Take your cursor in front of “Hey” and click on the “name” field
- You can see a tag has been added
{{name}}
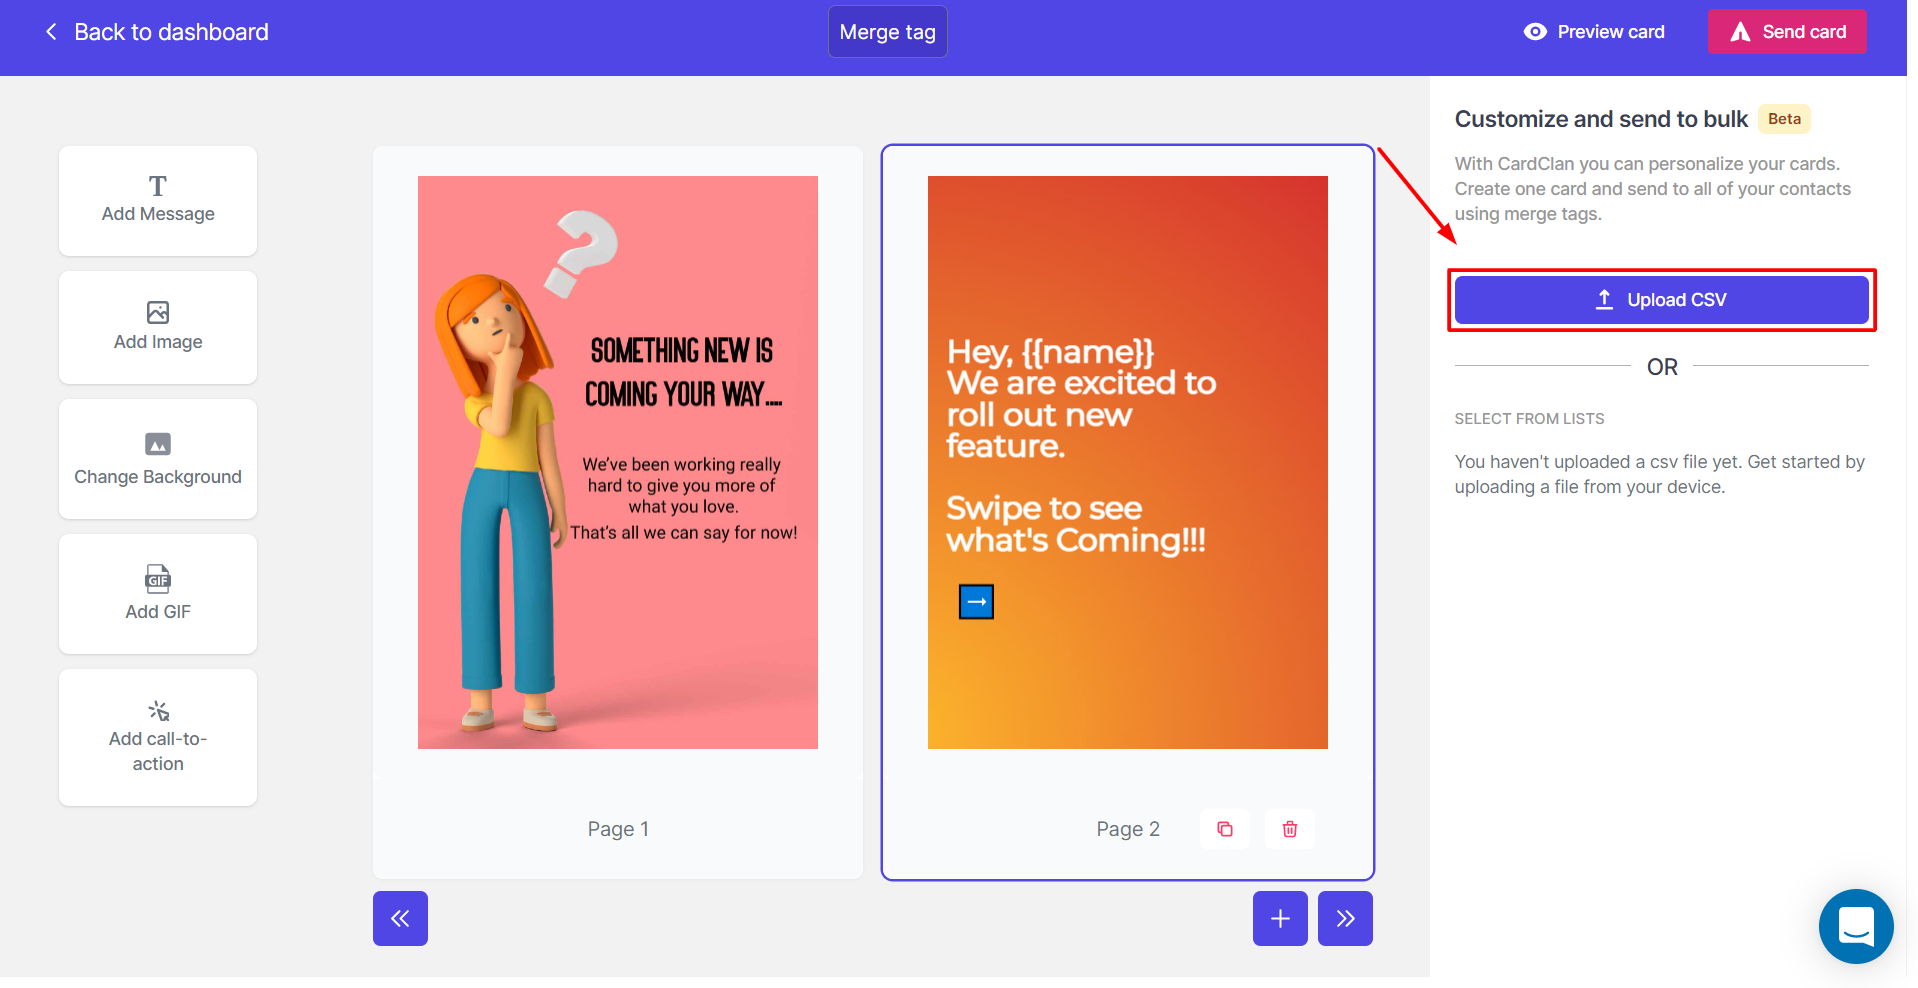
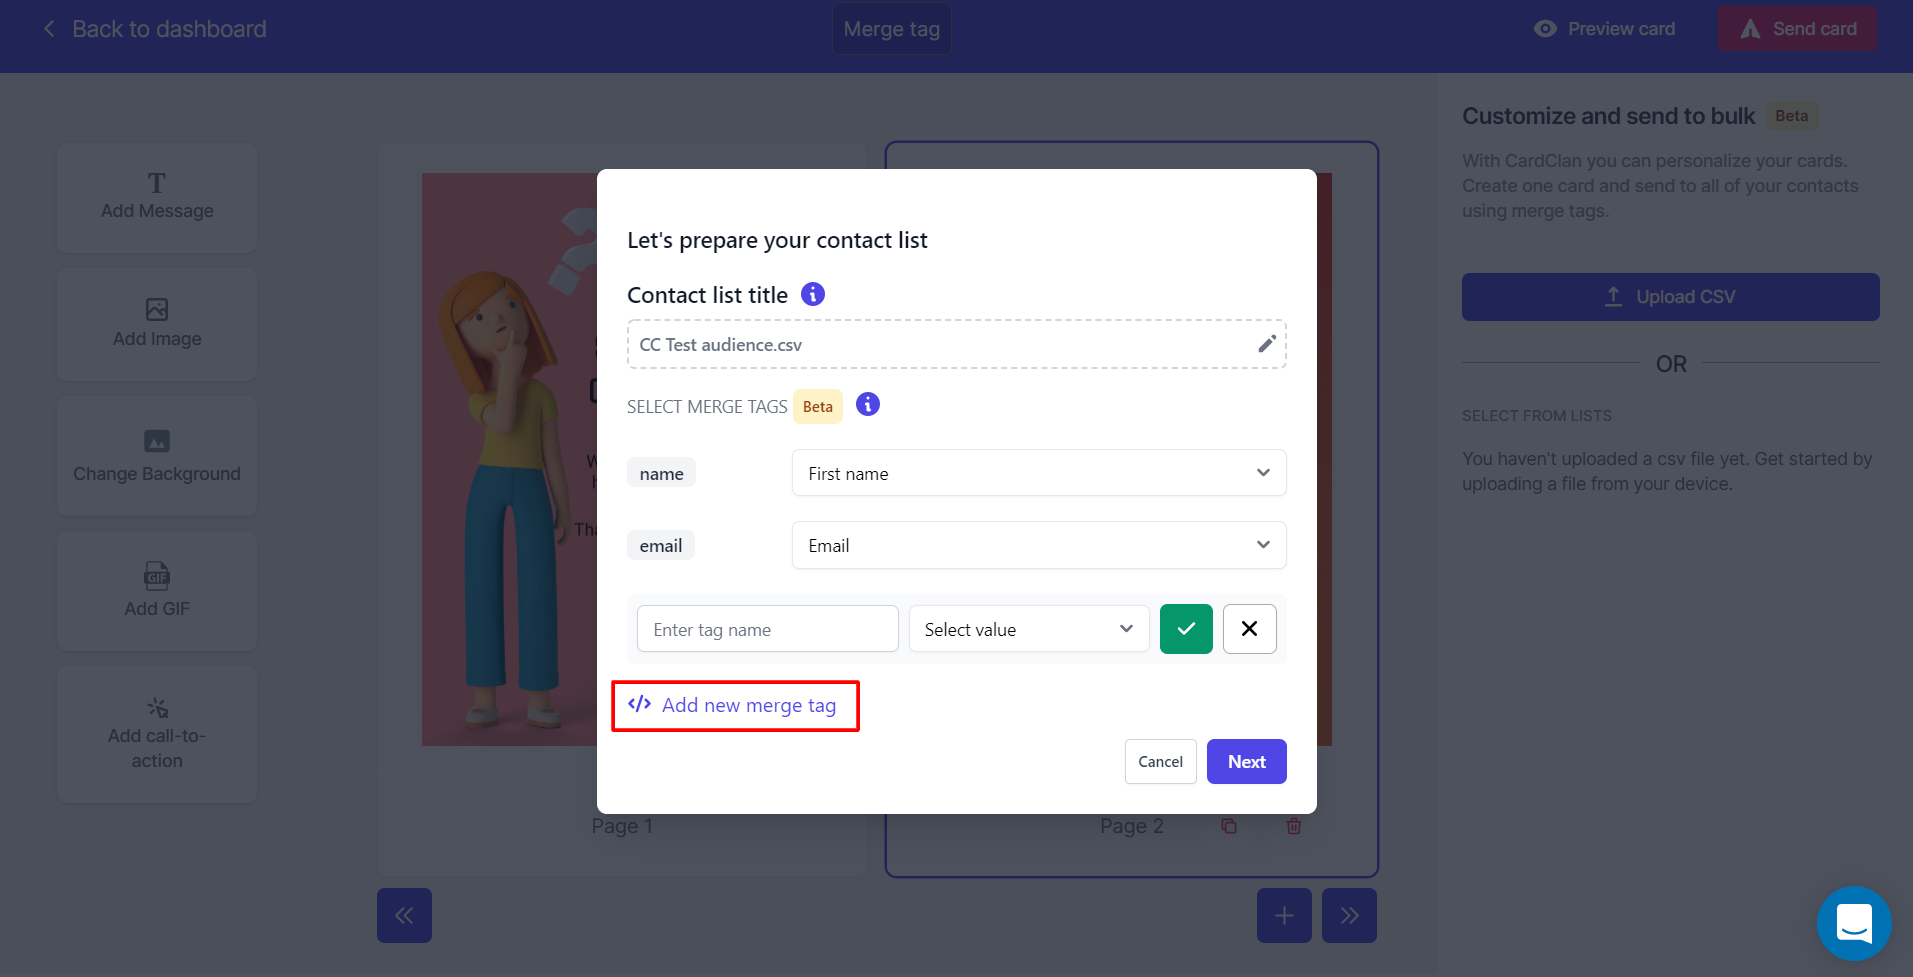
Step 4: Upload CSV
Now let’s upload a contact list:- Click on Upload CSV and choose a file in CSV format
Step 5: Define Merge Tag Fields
Once the file is selected:- Hit Next
- Define the merge tag fields by matching the Name with the name in your CSV file
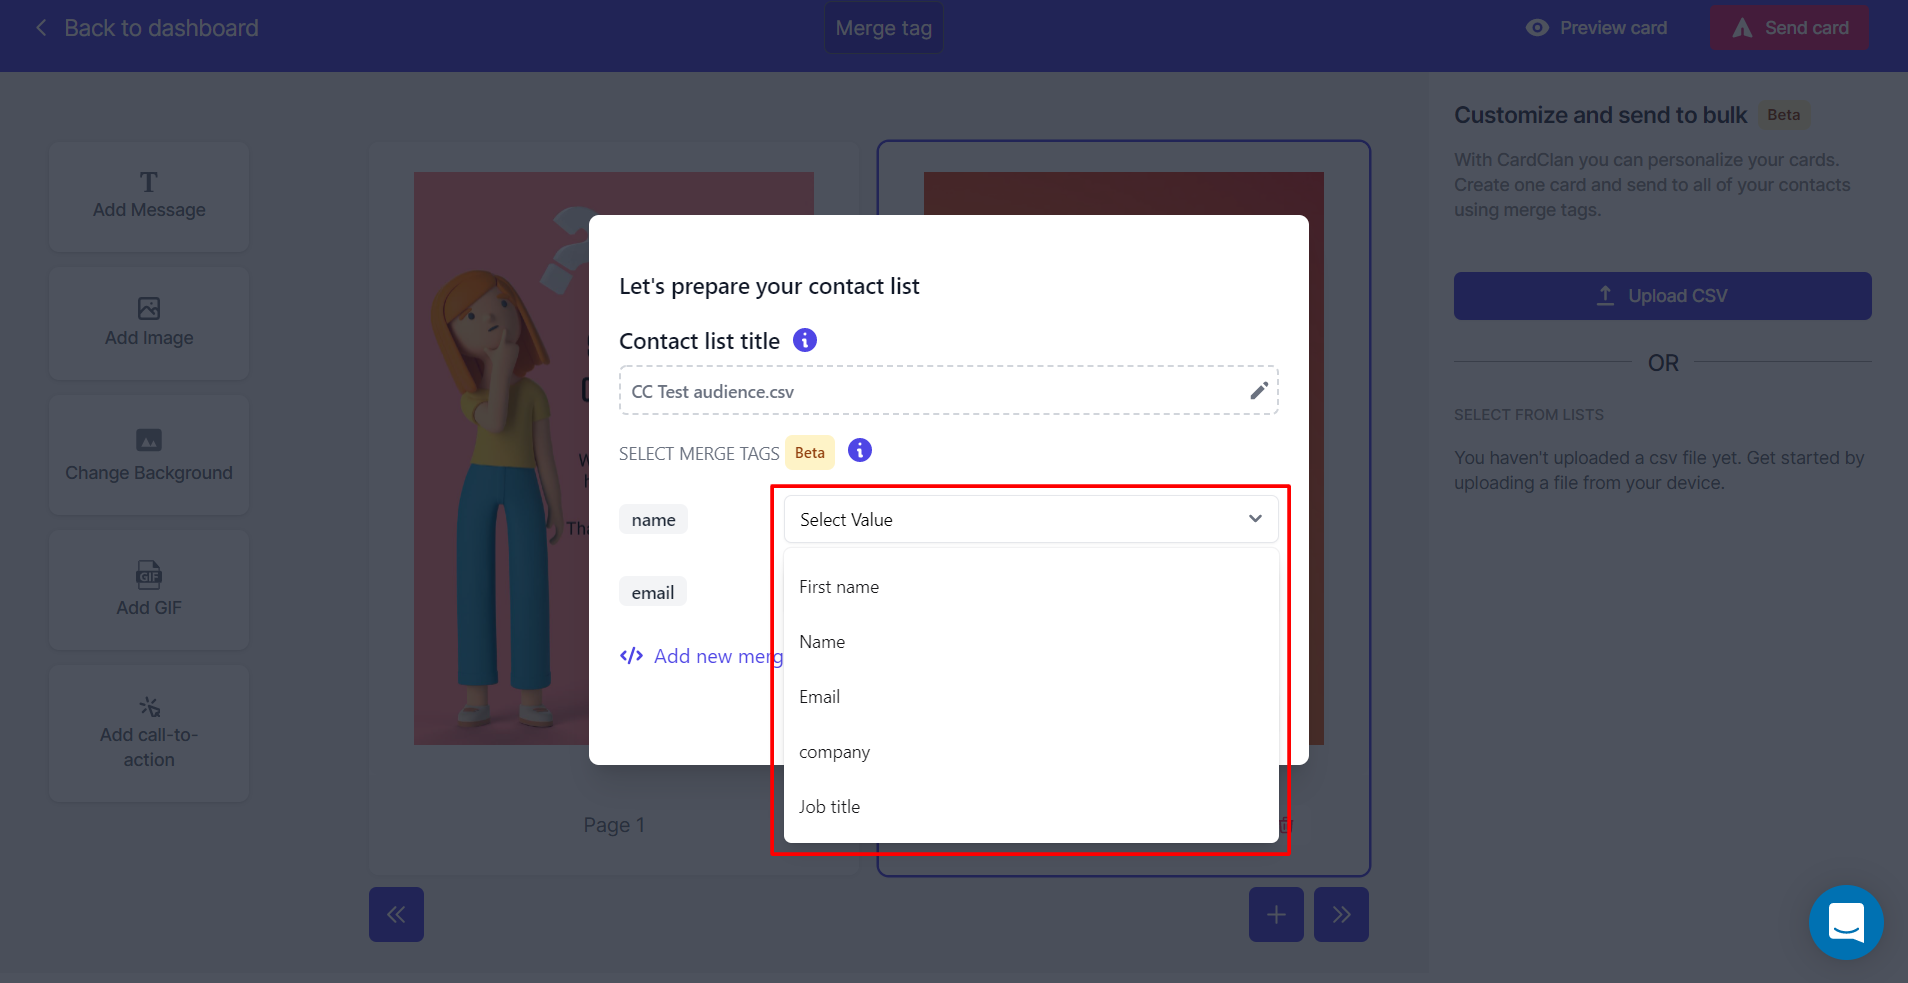
Step 6: Add Custom Merge Tags
You can also add a new merge tag by:- Clicking on “Add new Merge tag”
- Give it a name and select the adjacent column in CSV file by “selecting Value”
- Once you are done, click Next
Step 7: Review Errors
If there are any errors or missing fields, they will show up here for you to fix.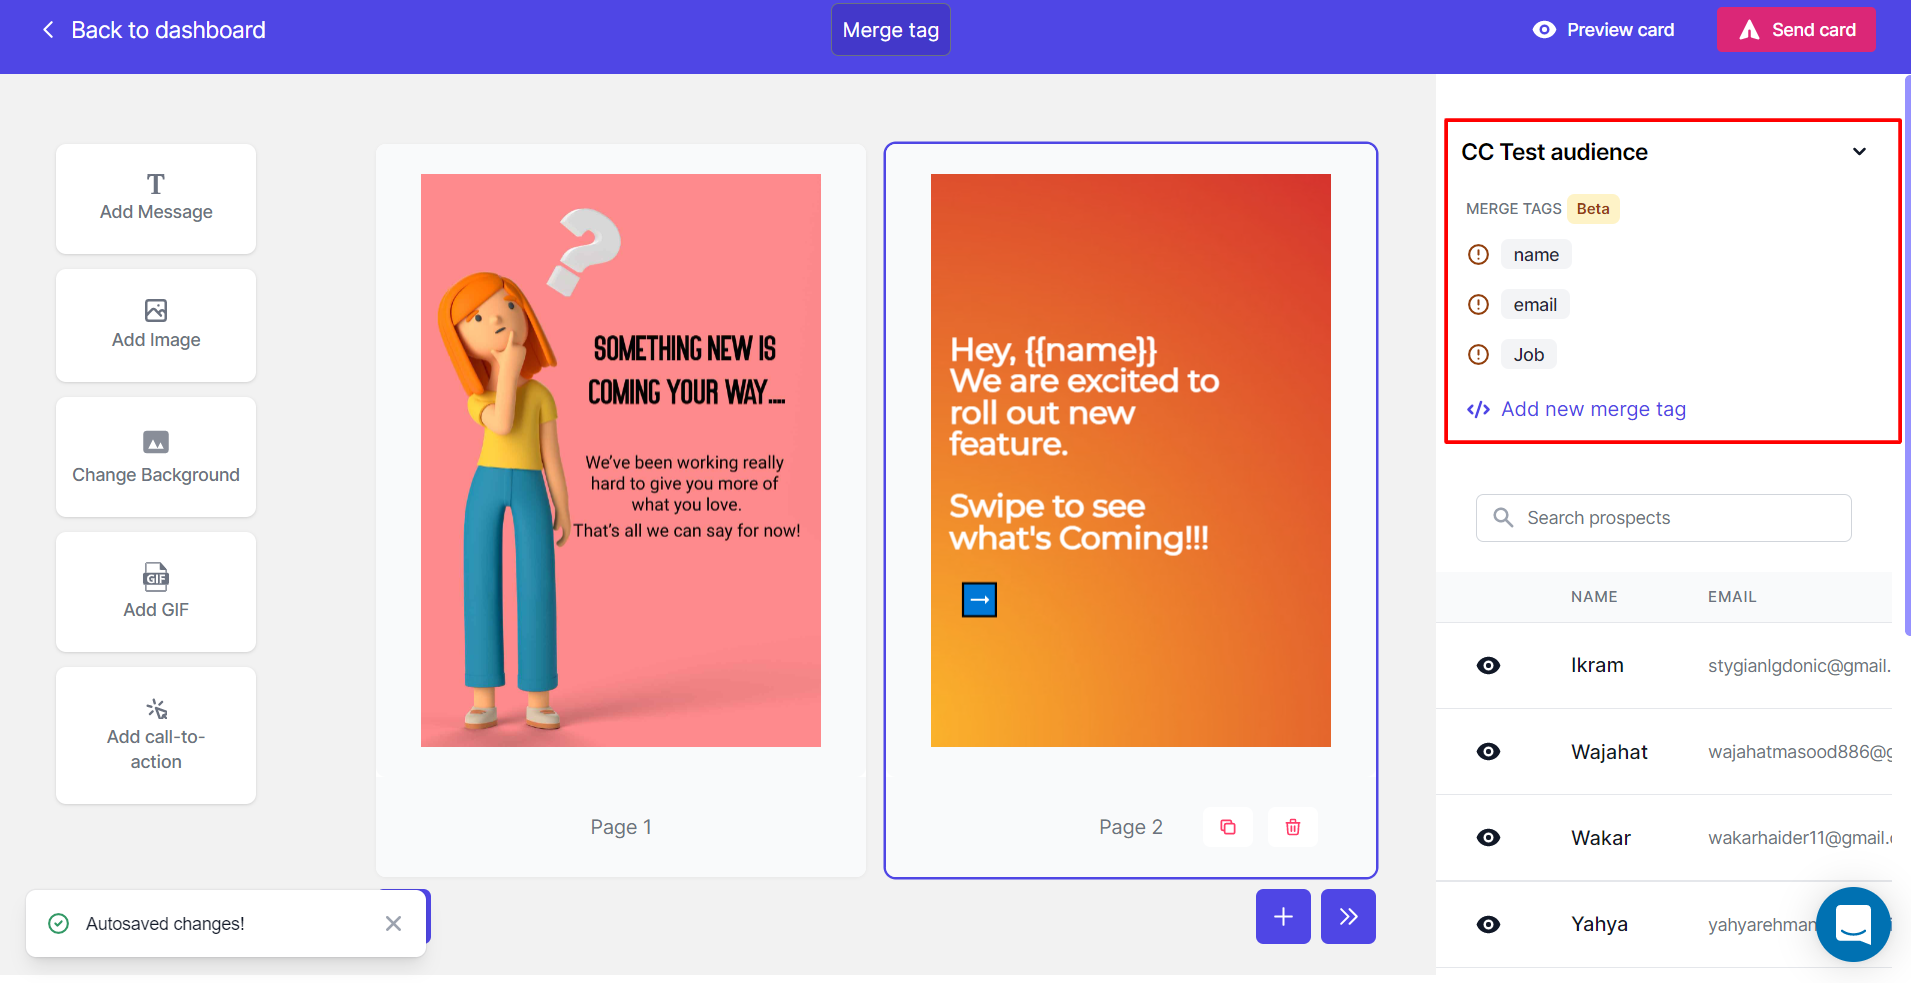
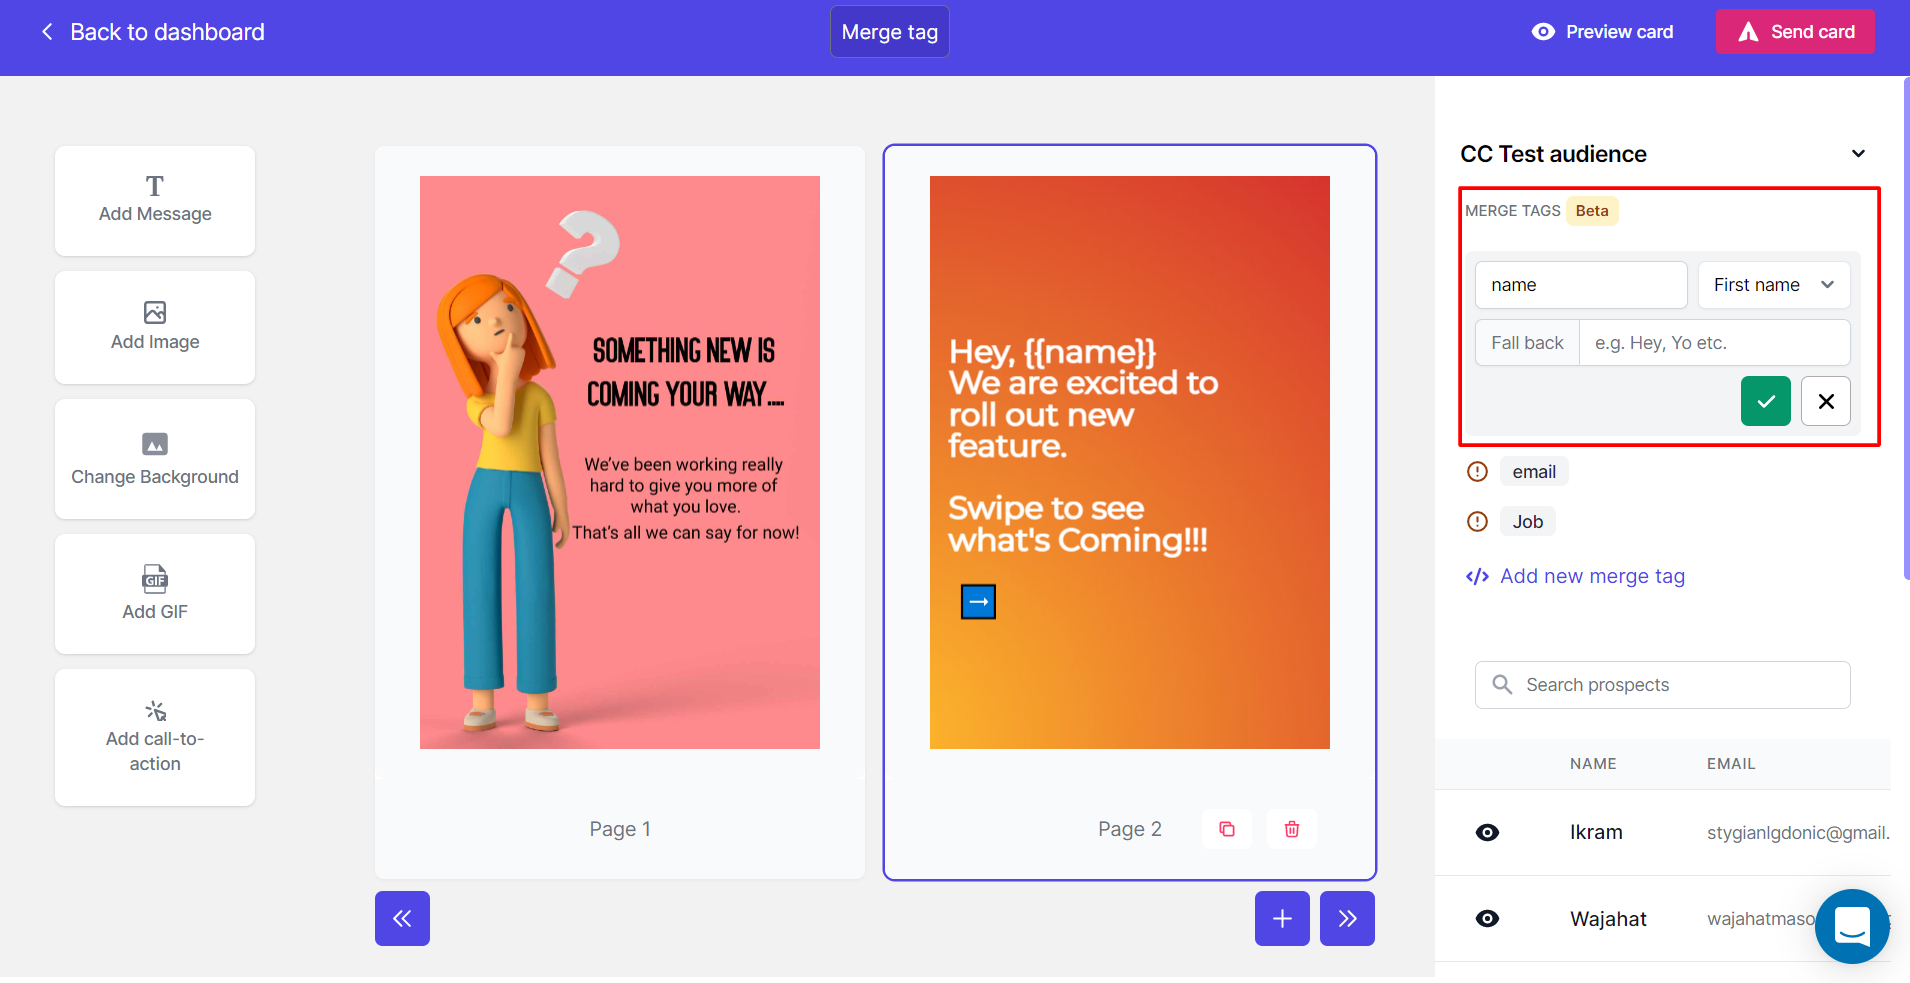
Step 8: Edit Merge Tags
If you hover your cursor over the merge tags you can:- Edit them
- Add a fallback value
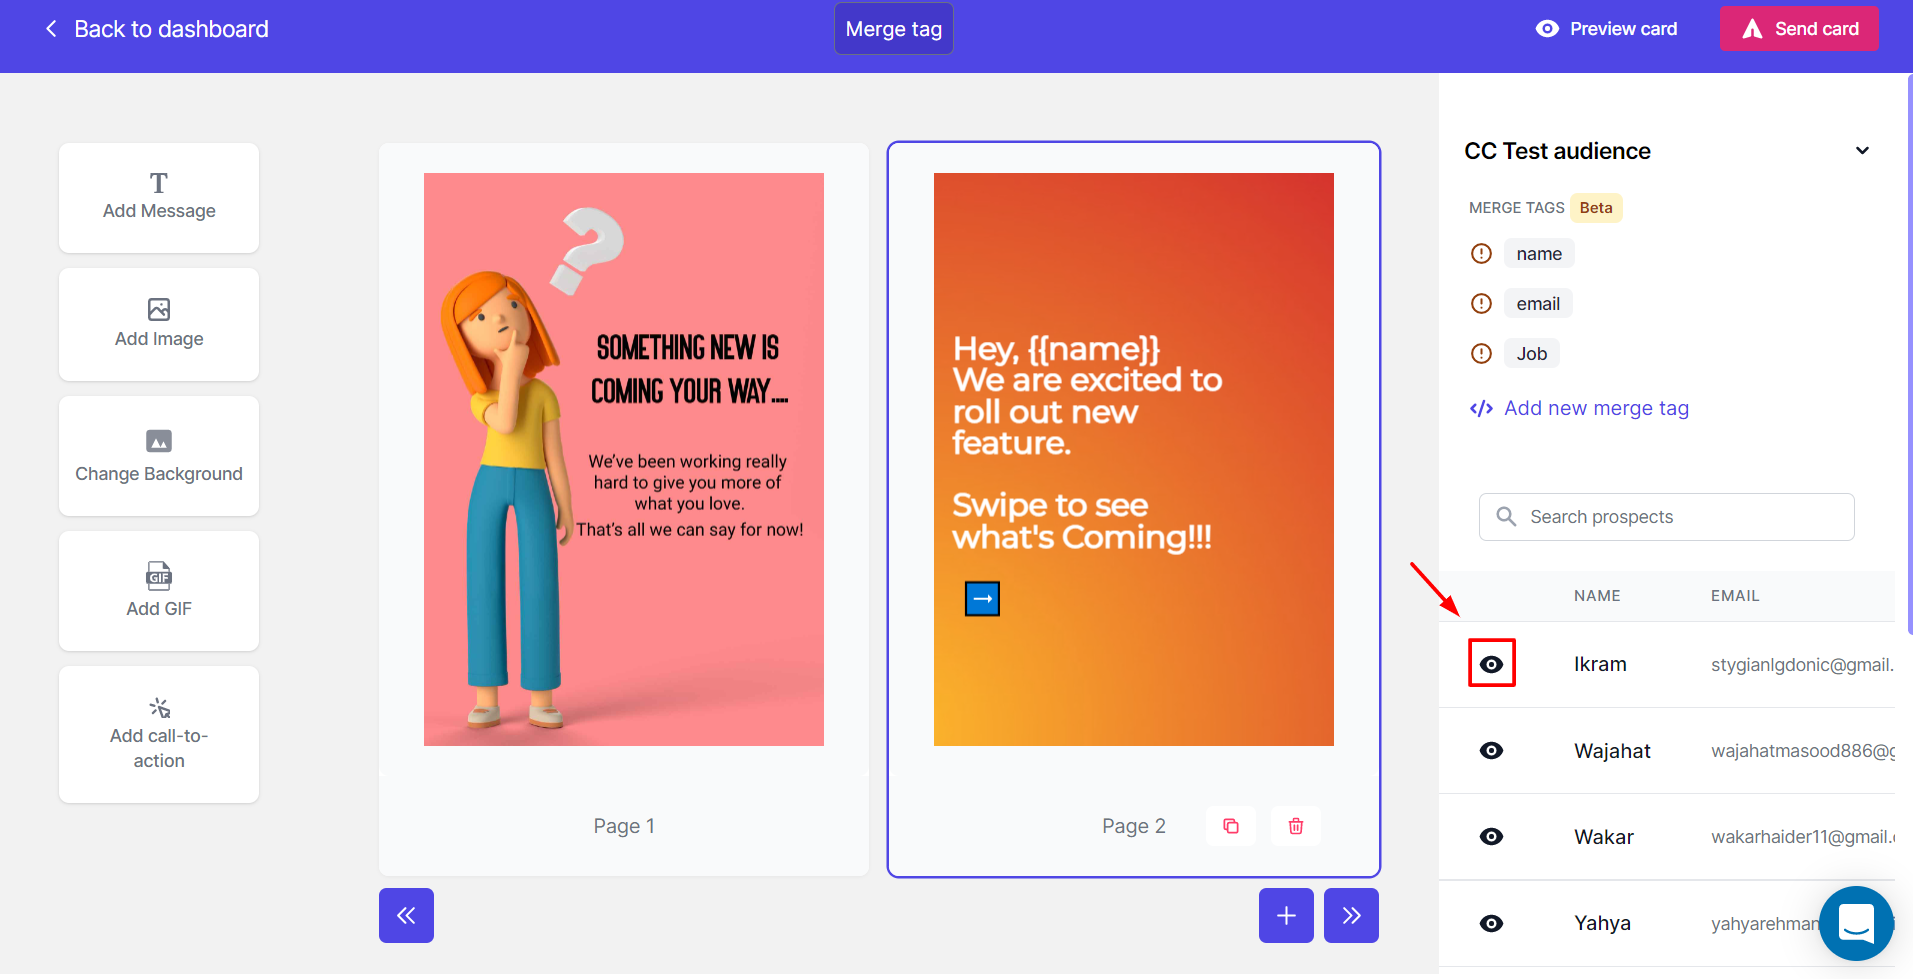
Step 9: Preview Personalized Cards
Let’s preview the personalized cards:- Click on the small eye icon on your right side
- You can see that merge tag
{{name}}has successfully replaced the first name from the list
If you have any queries, feel free to reach out to us in live chat or at hello@cardclan.io